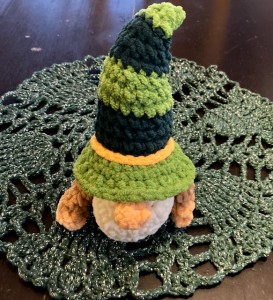
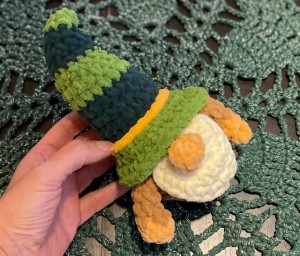
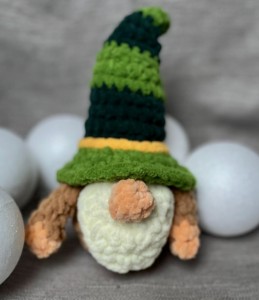
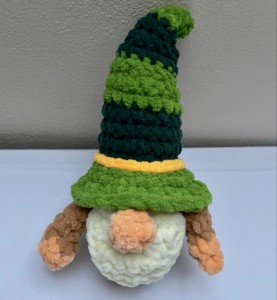
Crocheted Gnome With A Perfect Tall Striped Hat
Have a Lovely Day!
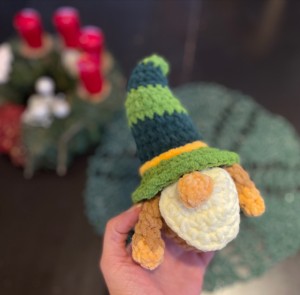
Today, I bring you a pattern for a super popular crocheted gnome. This little gnome or dwarf is simple to make and perfect for beginners!
The gnome is crafted from several parts that are crocheted and sewn together. The main piece combines the head, body, and hat, while additional parts include the arms, nose, and beard. You can personalize the hat with decorations like bows, snowflakes, flowers, bells, or even hearts.
I love creating gnomes in a variety of colors, with hats of different styles, sizes, and embellishments. This particular gnome is crocheted with Samet Soft Fine yarn, making it quick and easy to complete!
Everything is explained in the video tutorial, so you can decide on your own style and approach.
Crocheting this gnome is such a fun project! You can choose coordinating colors, use leftover yarn, or work with your favorite toy-making yarns.
Enjoy the process of selecting colors, crocheting, and gifting your loved ones!
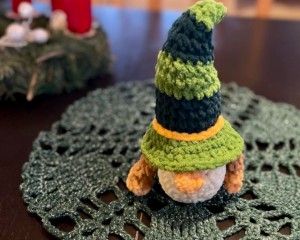
Hooray! It’s done! This adorable crocheted gnome is here to spread joy—perfect as a toy or a delightful decoration!
I believe this little wonder will bring smiles to anyone’s face, whether gifted to your children, grandchildren, or as a thoughtful present for a friend or loved one.
Excitement and happiness are guaranteed—this gnome is ready to add a touch of magic to your days!
VIDEO TUTORIAL
You can find the step-by-step video tutorials below which will help you along if you prefer to watch video instruction rather than using a written pattern. Don’t forget to subscribe if you like me videos, it’s FREE!
If you pin my patterns to your Favorites and share it on social media as a link, I will be able to share a lot more free crochet patterns for you all.
Stay in touch at Facebook, Instagram and Pinterest.
Let's start or PIN this idea to your Pinterest boards for later.

More Crochet patterns?
For even more crochet patterns, check out my e-book.
CROCHET WITH LOVE AND NEBESKA
I prepared for you the e-book CROCHET WITH LOVE AND NEBESKA, it is a set of more than 60 projects with instructions and video instructions for the whole year 2023!
You can download the e-book as a pdf with links to allow you to better find the guide you need. Or maybe you missed one of the pattern instructions and now it will make you happy, or you are just looking for inspiration and one of my ideas will move you in your next creation!
This e-book is FREE and you can share it with your friends. Due to the size, it is necessary to download CROCHET WITH LOVE AND NEBESKA from the link (it cannot be sent as an e-mail attachment). Click on the ebook link or image and download the e-book CROCHET WITH LOVE AND NEBESKA 2023 for FREE.
https://forms.gle/CyJZqXs4fTWechtE6
All of the patterns on that list of beautifully designed, and suitable for both beginners and experienced crocheters. They are different levels of difficulties and techniques that you might have never seen before. Just click on them and you can find the free pattern, each of the patterns comes with a video tutorial.
CROCHETED GNOME WITH A PERFECT TALL STRIPED HAT
This pattern is made for beginners - only a basic skill level is required to make it. If you don't understand any of my instructions, don't worry I am here for you.
Have questions? Join the Facebook Group OR my Youtube Community!
I hope this article will be useful for you! If you have any additional questions, feel free to join my Facebook Group or Youtube Community. I created these groups for you to share pictures, ask questions, and help each other out.
CROCHETED GNOME WITH A PERFECT TALL STRIPED HAT
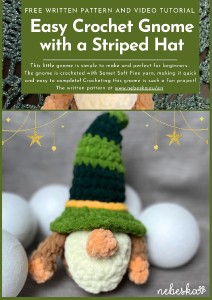
This CROCHETED GNOME WITH A PERFECT TALL STRIPED HAT is a cute Amigurumi Toy, easy and quick to crochet, great project for beginners. This little CROCHETED GNOME WITH A PERFECT TALL STRIPED HAT TOY PATTERN will give your own little one lots of fun at playtime.
CROCHETED GNOME WITH A PERFECT TALL STRIPED HAT
Amigurumi Cotton Yarn, the color you like for:
Head, body - (color A) - can be any color, I chose brown
Hands and nose (color B) - can be any flesh color, orange, apricot, ocher
Hat (color C and D) - used a lighter green and a darker green
Ribbon around the hat - I chose a strong yellow, like gold
Beard (color E) - can be any color - white, light brown, cream, etc.
The pattern was made with:
https://www.vlnika.cz/z23925-prize-samet-soft-fine
Samet Soft Fine: 1 skein = 100 % polyester, 100g / 100 m
4.5 mm crochet hook
Scissors
Stuffings
Sewing/Embroidery and yarn needle/tapestry needle for sewing pieces together and weaving in ends
Markers
Pins
Difficulty Level: Level 1 – Easy, for beginners
US crochet terms:
SlSt – slip stitch
CH/s – chain/s
SC - single crochet
HDC - half double crochet
SK - skip
T - turn
ST/s - stitch(es)
REP – repeat
SC2TOG = 2 single crochets together
Special stitches used:
Single Crochet Decrease (sc2tog)
A crochet decrease makes the current row or round that you are working on shorter than the one previous to it.
1. Insert hook into the first stitch.
2. Yarn over and draw through the loop.
3. Do not complete the stitch as normal.
4. Instead, insert the hook into the next stitch.
5. Yarn over and draw through the loop.
6. There should now be three loops on your hook
7. Yarn over and draw through all three loops on the hook
8. You should now have two single crochet stitches side-by-side, joined together into one stitch at the top.
This pattern requires familiarity with stitches used, attaching yarn, sewing parts together with a sewing needle.
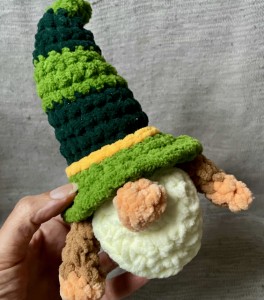
CROCHETED GNOME WITH A PERFECT TALL STRIPED HAT
1) A ch1 at beg of the row DOESN'T count as a stitch
2) Magic ring = the starting point for crocheting in a spiral. Use which ever method you prefer.
3) Continuous rounds - HEAD + BODY, HAT, HANDS AND NOSE parts are worked up in continuous rounds, which means that you will not be joining the last stitch of the round with the first one. Instead you will need to keep track of where each round started and how many stitches you have made because after each round you will continue right on to the stitches of the next round (with no join). It is useful to use a stitch marker or piece of yarn to mark the start or end of each round.
4) ( ) – The number of stitches that should be in a completed round/row are placed in brackets at the end of that round’s/row’s instructions.
5) This CROCHETED GNOME WITH A PERFECT TALL STRIPED HAT Amigurumi measures:
22 cm / 8.6 inch tall
15 cm / 5.9 inch wide
The finished size will depend on what yarn you use, as well as your tension and hook (as with any amigurumi).
6) You can make the CROCHETED GNOME WITH A PERFECT TALL STRIPED Amigurumi bigger with a thicker yarn or a larger hook size.
7) There is some sewing: you will sew the hands on the body, the beard and the nose on the head. This is easy to do, there are no tricks.
CROCHETED GNOME WITH A PERFECT TALL STRIPED HAT
THE WRITTEN PATTERN
Body + Head + Hat
Yarn Color A
Hook: 4.5 mm
- Ch 1 at the start of each round does not count as a stitch.
- Begin with a magic ring and work in continuous rounds without joining.
R 1: Ch 1, 6 sc into the magic ring (6 sts).
R 2: 2 sc in each st around (12 sts).
R 3: 2 sc in the next st, 1 sc in the next st repeat around (18 sts).
R 4: 1 sc in each st, working in back loops only (18 sts).
R 5: 2 sc in the next st, 1 sc in the next 2 sts, repeat around (24 sts).
Rs 6-9: 1 sc in each st around (24 sts).
R 10: sc2tog, 1 sc in next 4 sts, repeat around (20 sts).
Stuff the head and body with fiberfill.
Fasten off.
Hat
Yarn Color C
R 11: 1 sc in each st, working in back loops only (20 sts).
Rs 12-13: 1 sc in each st around (20 sts).
R 14: sc2tog, 1 sc in next 8 sts, repeat around (18 sts).
Switch to Color D
Rs 15-16: 1 sc in each st around (18 sts).
R 17: sc2tog, 1 sc in next 4 sts, repeat around (15 sts).
Switch to Color C
R 18: 1 sc in each st around (15 sts).
R 19: sc2tog, 1 sc in next 3 sts, repeat around (12 sts).
R 20: sc2tog, 1 sc in next 2 sts, repeat around (9 sts).
Switch to Color D
R 21: 1 sc in each st around (9 sts).
R 22: sc2tog, 1 sc in next 2 sts, repeat around (7 sts).
R 23: sc2tog, 1 sc in next st, repeat around (4 sts).
Fasten off and sew the top closed.
Optional: Insert wire into the hat to shape and bend it to one side.
Bottom of the Hat
Turn the hat upside down.
Yarn Color D
R 1: Join new yarn in R 11: 1 sc in each st around (20 sts).
R 2: 2 sc in next st, 1 sc in next 4 sts, repeat around (24 sts).
R 3: 2 hdc in next st, 1 hdc in next 4 sts, repeat around (30 sts).
Fasten off and weave in the ends.
Nose
Hook: 4.5 mm
- Begin with a magic ring and work in continuous rounds.
R 1: 4 sc into the magic ring.
R 2: 1 sc in each st around (4 sts).
Fasten off, leaving a long tail for sewing.
Arms
Yarn Color B
R 1: 4 sc into the magic ring.
R 2: 1 sc in each st around (4 sts).
Switch to Color A
Rs 3-6: 1 sc in each st around (4 sts).
Fasten off, leaving a long tail for sewing.
Beard
Ch 7.
Row 1: 1 sc in the 2nd ch from the hook and in each ch across, turn (6 sts).
Row 2: Ch 1, skip the first st, 1 sc in each st across, turn (5 sts).
Row 3: Ch 1, skip the first st, 1 sc in each st across, turn (4 sts).
Row 4: Ch 1, skip the first st, 1 sc in each st across, turn (3 sts).
Row 5: Ch 1, skip the first st, 1 sc in each st across, turn (2 sts).
Row 6: Ch 1, skip the first st, 1 sc in each st (1 st).
Row 7: Sc evenly around the entire beard.
Fasten off, leaving a long tail for sewing.
Assembly
- Sew the arms to the sides of the body.
- Attach the beard to the head.
- Sew the nose onto the center of the beard.
- Add decorations to the hat, such as stars, hearts, or snowflakes.
Weave in all loose ends securely. Enjoy your adorable crochet gnome!
STUFFING
The exact moment for starting filling and stuffing the toy depends on every single person. I prefer filling the toy with the work almost finished. It’s a bit more difficult to fill, but more comfortable to crochet. You should make proofs until finding the more suitable moment of filling for you.
Stuff head and body firmly and full. Shape as you stuff, make sure to shape the nose too.
Use a stuffing stick or the back end of a pencil to push the stuffing into the right spots
What’s Next?
Pin this post: Save this tutorial to your Pinterest boards so that you can come back to it later.
Leave a comment: I love to hear your feedback. Tell me in the comments below!
Share on Instagram and Facebook: When you make this project, share it on social media and tag me @sonanebeska. I love to see what you make!
More Crochet TOY's patterns?
For even more TOY'S crochet patterns, check out my collection.
All of the patterns on that list of beautifully designed, and suitable for both beginners and experienced crocheters.
Explore More Crochet Patterns
If you love to crochet as much as I do, I think you’ll love these other free crochet patterns.
♥♥♥
Have fun and let me know what you make. I would love to know how your project turns out.
Please don't forget to like and I really appreciate your comments.
If the pattern did not make sense to you, please don’t hesitate to contact me, I am happy to help :)
If you like this pattern, please follow and share my projects on social networks as a THANK YOU and to help me to create new projects and patterns for you.
Thank you very much once again for your visit and see you soon!
♥♥♥
