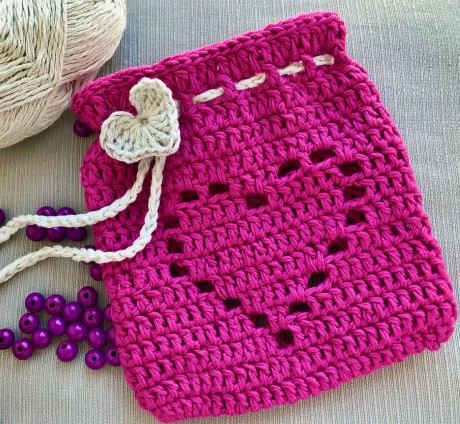
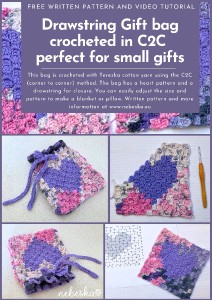
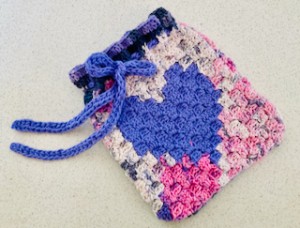
Drawstring Gift bag crocheted in C2C with a heart - perfect for small gifts
Hello My Crochet Friends! Beautiful day everyone!
I love crocheting all kinds of bags, pouches, and sacks. They make great gift bags, and you can fill them with treats, sweets, or gift cards for your loved ones!
For this gift bag, I chose the C2C (corner-to-corner) method, which is a very popular crochet technique. If you love C2C and have already made blankets, cushions, or towels, you'll find this pattern a breeze.
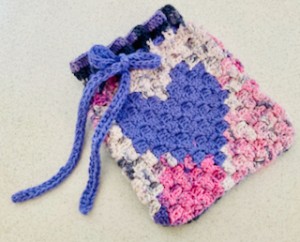
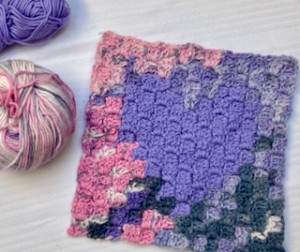
Crocheting is very easy, I only use single crochets, double crochets, and chain stitches. For the top edge, I only use double crochets. You can also make these gift bags from leftover yarn. I used leftover variegated yarn and a solid-colored Terezka yarn.
You can easily adjust the size of the bag by adding or removing rows. You can also customize the pattern in the middle.
In the tutorial, I'll show you how to crochet a heart pattern on the bag.
Enjoy crocheting and giving gifts to your loved ones!
VIDEO TUTORIAL
You can find the step-by-step video tutorials below which will help you along if you prefer to watch video instruction rather than using a written pattern. Don’t forget to subscribe if you like me videos, it’s FREE!
![]()
If you pin my patterns to your Favorites and share it on social media as a link, I will be able to share a lot more free crochet patterns for you all.
Stay in touch at Facebook, Instagram and Pinterest.
Let's start or PIN this idea to your Pinterest boards for later.
![]()
More pattern? CROCHET WITH LOVE AND NEBESKA
I'm thrilled to present my 2024 e-book, CROCHET WITH LOVE AND NEBESKA!
Inside, you'll discover over 60 projects with patterns and video tutorials to inspire you all year long.
You can download the e-book as a PDF, complete with clickable links to easily find the patterns you're looking for. Perhaps you missed a pattern and are now happy to find it here.
Or maybe you're just looking for inspiration for your next project – I hope my ideas spark your creativity! The e-book is FREE and you can share it with your friends.
Due to its size, the e-book is available for download only via the link below (it cannot be sent as an email attachment). Click the link image below to download the CROCHET WITH LOVE AND NEBESKA 2024 and 2023 e-books for FREE!

Have questions? Join the Facebook Group!
I hope this article will be useful for you! If you have any additional questions, feel free to join my Facebook Group. I created this group for you to share pictures, ask questions, and help each other out.
DRAWSTRING GIFT BAG CROCHETED IN C2C PERFECT FOR SMALL GIFTS
This DRAWSTRING GIFT BAG is easy and quick to crochet, great project for beginners.
MATERIALS, INSTRUCTIONS AND RECOMMENDATIONS
Even a beginner can easily crochet this C2C bag. You can play with different color variations.
I used Terezka cotton yarn, which I like to use for small projects and toys.
What will we need?
Yarn: Terezka
50 g / 155m / 100% cotton
https://www.vlnika.cz/z8544-prize-terezka
Choose the colors you like.
Hook: 2.5 mm
Sewing needle and embroidery needle
Scissors
![]()
Difficulty Level: Level 1 – Easy, for beginners
US crochet terms:
SlSt – slip stitch
CH/s – chain/s
SC - single crochet
HDC - half double crochet
DC - double crochet
TR - treble
SK - skip
T - turn
ST/s - stitch(es)
REP – repeat
DRAWSTRING GIFT BAG CROCHETED IN C2C PERFECT FOR SMALL GIFTS
INSTRUCTIONS AND NOTES
- The size in the pattern below is for a small bag.
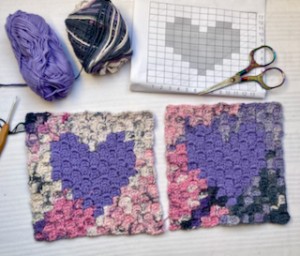
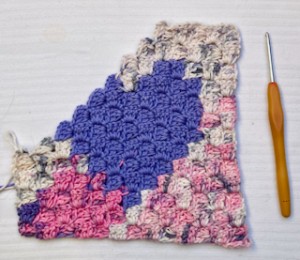
- We crochet using the C2C technique, working in diagonal rows from the bottom right corner to the upper left corner. We crochet a square.
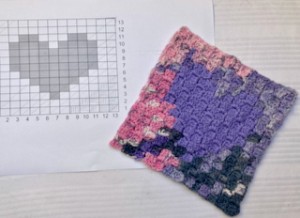
- Before you start crocheting, I recommend creating a picture on a square grid, or you can use the pre-made heart pattern that I used in my design.
- The heart pattern PDF is available for download:
C2C Drawstring Gift Bag with heart chart.pdf - In the pattern, 3 chain stitches at the beginning of the row serve as a substitute for a single crochet.
- Size according to the chosen hook:
width: 17 cm ≈ 6,69 inch
height: 19 cm ≈ 7,48 inch
The size can vary depending on your crochet tension.
DRAWSTRING GIFT BAG CROCHETED IN C2C PERFECT FOR SMALL GIFTS
THE WRITTEN PATTERN
Crochet hook 2.5 mm
R1 = 1 BLOCK
STEP 1: Chain 6
STEP 2: Double crochet into the 4th chain from the hook
STEP 3: Double crochet into the next 2 chains
R2 = 2 BLOCKS
STEP 4: Chain 6
STEP 5: Double crochet into the 4th chain from the hook
STEP 6: Double crochet into the next 2 chains
STEP 7: Double crochet in the space between 3 chain stitches and 1 double crochet from the previous R1 row
STEP 8: Chain 3
STEP 9: 3 double crochets into the 3 chain stitch space
R3 = 3 BLOCKS
Repeat steps 4 to 9
Each subsequent row adds one more block, making the square grow in both directions.
Keep adding rows until the square is the desired size.
To decrease the size, simply reduce the number of blocks in each row.
This is a great method for beginners as it's easy to adjust the size as you go.
I made 13 rows for a square that measures 17 cm wide.
You can make yours bigger or smaller.
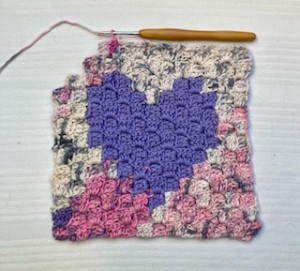
Next, we'll start decreasing the number of blocks in each row on both sides. This will create a square shape.
Continue decreasing until you have only one block left at the top.
There are 12 more rows to complete.
Instead of increasing the number of blocks, we'll now be working a straight edge. This means we won't be adding any new blocks.
The crocheting differs only at the beginning of the row, the rest of the procedure is the same. We skip steps 1 to 6. Simply put: we skip "6 chain stitches, 1 double crochet into the 4th chain from the hook, and 1 double crochet into the next 2 chains".
Step 1: instead of 3 chain stitches at the beginning of the block, we move using slip stitches.
To start each row, ch1 and crochet slip stitch into the next 4 double crochets of the previous row.
Step 2: 1 sl stitch into the 3-chain space
Step 3: Chain 3
Step 4: 3 double crochets into the 3-chain space of the previous row
Then, we'll follow the same pattern as before: chain 3, 3 double crochets into the chain space.
Repeat steps 2-4 until you crochet all the blocks in the row.
Repeat this until you reach the end of the square.
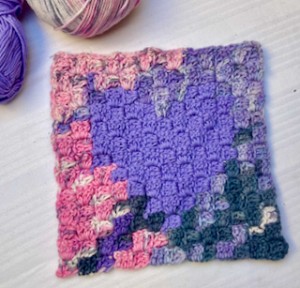
We will crochet two squares of the same size.
Place the squares right sides together, with the wrong side facing up.
NOTE: don’t cut the yarn, let’s join both parts together.
We will join the two squares together by crocheting along three sides, leaving the top edge open.
TOP EDGE
We will crochet 3 more rows at the top.
In the first row, we will create spaces for the drawstring.
We will use the same hook and yarn.
Without cutting the yarn, we will continue crocheting.
We will start from the corner and crochet along the top edge as follows:
Row 1: *Chain 3 (counts as a double crochet), 1 double crochet in the next stitch, chain 2, skip 2 stitches*. Repeat from * to end of row. Join with a slip stitch to the 3rd chain at the beginning of the row.
Row 2: *Chain 3, 1 double crochet in the next stitch, 2 double crochets in the next 2 chain spaces*. Repeat from * to end of row. Join with a slip stitch to the 3rd chain at the beginning of the row.
Row 3: Chain 3, 1 double crochet in each stitch across. Join with a slip stitch to the 3rd chain at the beginning of the row. Fasten off and weave in ends.
DRAWSTRING
Now we'll crochet a drawstring using half double crochets. Make it as long as you need, depending on how you want to tie the bag. Thread the drawstring through the spaces at the top of the bag.
Hurrah! Your adorable heart-shaped gift bag is finished! I'm sure it will make a lovely gift and surprise your loved ones!
What’s Next?
Pin this post: Save this tutorial to your Pinterest boards so that you can come back to it later.
Leave a comment: I love to hear your feedback. Tell me in the comments below!
Share on Instagram and Facebook: When you make this project, share it on social media and tag me @sonanebeska. I love to see what you make!
More Crochet TOY'S patterns?
For even more TOY'S crochet patterns, check out my collection.
All of the patterns on that list of beautifully designed, and suitable for both beginners and experienced crocheters.
Explore More Crochet Patterns
If you love to crochet BASKETS as much as I do, I think you’ll love these other free crochet patterns.
♥♥♥
Have fun and let me know what you make. I would love to know how your project turns out.
Please don't forget to like and I really appreciate your comments.
If the pattern did not make sense to you, please don’t hesitate to contact me, I am happy to help :)
If you like this pattern, please follow and share my projects on social networks as a THANK YOU and to help me to create new projects and patterns for you.
Thank you very much once again for your visit and see you soon!
♥♥♥