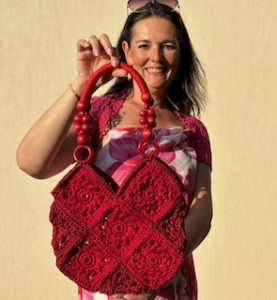
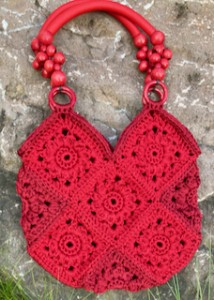
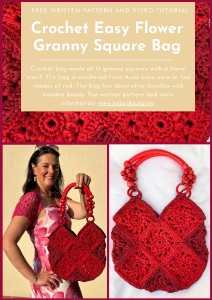
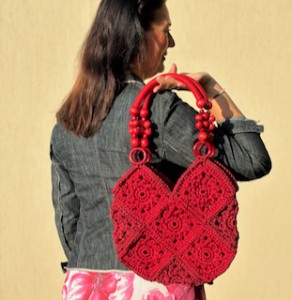
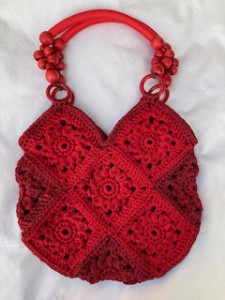
Crocheted flower granny square bag with decorative handles
Hello My Crochet Friends!
Bags, rucksacks, sacks, purses, net bags, and market bags—this is my favorite crochet topic and go-to gift idea for friends, family, and anyone I want to delight with a handmade present.
I adore crocheting granny square bags! There’s something so magical about making individual squares, arranging them in different shapes, and watching them come together to form a functional bag.
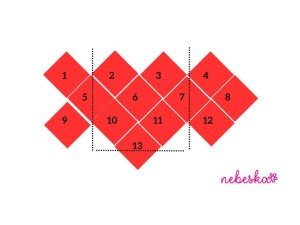
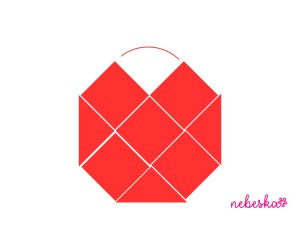
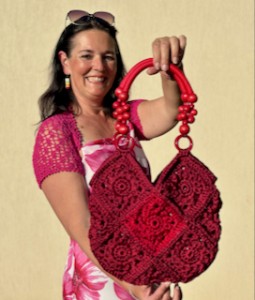
Today, I have prepared a very easy tutorial for a handbag, which consists of 13 simple squares and is completed with purchased handles decorated with wooden beads. The bag has a straightforward construction: you just fold and sew the squares together. In the instructions, I will show you how to assemble a bag from 8, 10, or 13 squares. This allows you to create a bigger or smaller, wider or narrower bag—according to your needs and taste.
This flower granny bag is so dainty and sweet. I think it looks beautiful with scattered flower squares at the centers of the granny squares!
The bag is simple, stylish, and comfortable. I chose the popular yarn for bags and handbags from AYAZ Lace. There are many beautiful colors on offer that you can combine or use to crochet a monochromatic bag.
The handbag is crocheted from squares, each with only four rows. I use single, half-double, and double crochets, making it easy enough for beginners. No special knowledge of crochet is needed; everything is explained and demonstrated in detail in the video tutorial.
VIDEO TUTORIAL
You can find the step-by-step video tutorials below which will help you along if you prefer to watch video instruction rather than using a written pattern. Don’t forget to subscribe if you like me videos, it’s FREE!
This pattern is made for very beginners and with my video tutorials everyone will manage to crochet this amazing pattern. If you don't understand any of my instructions, don't worry I am here for you - enter the comments at the end of this post.
A huge thanks to everyone who want to support my blog and download PDF paid pattern. Thank you very much, I really appreciate it and it helps me create more new video tutorials and patterns for you. Love you!
If you pin my patterns to your Favorites and share it on social media as a link, I will be able to share a lot more free crochet patterns for you all.
Stay in touch at Facebook, Instagram and Pinterest.
Let's start or PIN this idea to your Pinterest boards for later.
CROCHETED FLOWER GRANNY SQUARE BAG WITH DECORATIVE HANDLES
This pattern is made for beginners - only a basic skill level is required to make it. If you don't understand any of my instructions, don't worry I am here for you.
Have questions? Join the Facebook Group!
I hope this article will be useful for you! If you have any additional questions, feel free to join my Facebook Group. I created this group for you to share pictures, ask questions, and help each other out.
So let me now get started and tell you what you will need in order to crochet this CROCHETED FLOWER GRANNY SQUARE BAG WITH DECORATIVE HANDLES.
PATTERN DIRECTIONS
skein: 250 g / 225 m / 100 % polyester
https://www.vlnika.cz/z11905-prize-lace
You will need also decorative handles: https://www.vlnika.cz/z14965-ucha-k-taskam
scissors and tapestry needle.
2) end each round with a slip stitch in the 1st stitch or 3rd ch at the beginning of the row
3) the handbag is crocheted from 13 squares of the same size. You can crochet a larger, wider or smaller, lower bag according to the number of squares.
4) You can choose any colors or crochet in one color. I crocheted from 7 dark squares and 6 light red ones.
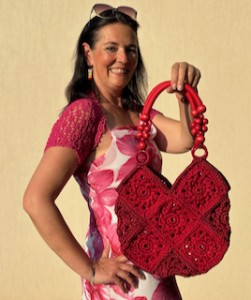
high: 32 cm
width: 32 cm
width between handles: 19 cm
length with the handle: 50 cm
THE SQUARE
R1: ch1, 12 sc in magic ring. Then close the ring, sl st to first st (12 single sts)
R2. ch1, 1sc in each st around. Close round with sl st in 1st st from beg of row (12 sc)
R3: ch2 + 3dc cluster in 1st st, ch3, repeat *4dc cluster in next st, ch3* around. Close round with sl st in the top of the 1st cluster (12 clusters and ch3 between them)
R4: (ch3 + 2dc + ch3 + 3dc) in 1st ch sp, 3hdc in next 2 ch3sp, repeat *(3dc + ch3 + 3dc in next ch3sp, 3hdc in next 2 ch3sp* around. Close round with sl st in 3rd ch from beg of row.
Cut the yarn. Fasten off and weave in the ends
Make 13 Squares
The 13 granny squares will be arranged and folded to form the bag. Arrange the 13 granny squares as shown below.
Sew the squares by going through the outer loops of both granny squares. Note that the right sides of the granny squares should always be facing you when seaming.
Top Edging and Handles
We will now crochet the top edging of the bag, which is worked along the top edges of the granny squares.
R1: Rejoin a new yarn in the right corner of the top edge. Single crochet (sc) in each stitch around the top edges of both granny squares on one side, and then the top edges of both granny squares on the other side. Work a single crochet (sc) in each stitch around. Don’t close the round with a slip stitch (sl st); continue crocheting into the next round (R2).
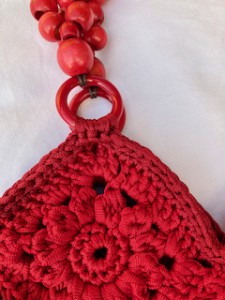
R2: Slip stitch (sl st) in each stitch around. When you reach the top tip, it is time to attach the handles. Work 3 single crochets (sc) in the corner and at the same time into the ring of the handle. Continue crocheting slip stitches (sl st) around until the top tip of the next granny square and attach the ring as well. Repeat these instructions on the opposite side of the bag.
At the end of the round, close with an invisible join.
That’s it! Now you can personalize your wonderful flower granny summer bag by adding a flower, a label, or some buttons. Enjoy the summer with this amazing flower granny bag!
What’s Next?
Pin this post: Save this tutorial to your Pinterest boards so that you can come back to it later.
Leave a comment: I love to hear your feedback. Tell me in the comments below!
Share on Instagram and Facebook: When you make this project, share it on social media and tag me @sonanebeska. I love to see what you make!
More Crochet patterns? Check some of my favorite tutorials:
For even more crochet Home Decoration patterns, check out my collection.
I prepared a playlist:
or visit the web page:
All of the patterns on that list of beautifully designed, and suitable for both beginners and experienced crocheters. They are different levels of difficulties and techniques that you might have never seen before. Just click on them and you can find the free pattern, each of the patterns comes with a video tutorial.
Explore More Crochet Patterns
If you love to crochet as much as I do, I think you’ll love these other free crochet patterns.
♥♥♥
Have fun and let me know what you make. I would love to know how your project turns out.
Please don't forget to like and I really appreciate your comments.
If the pattern did not make sense to you, please don’t hesitate to contact me, I am happy to help :)
If you like this pattern, please follow and share my projects on social networks as a THANK YOU and to help me to create new projects and patterns for you.
If you pin my patterns to your Favorites and share it on social media as a link, I will be able to share a lot more free crochet patterns for you all.
Stay in touch at Facebook, Instagram and Pinterest.
Thank you very much once again for your visit and see you soon!
♥♥♥
